
Installation and first steps
Installation
Section titled “Installation”- Make sure WooCommerce is installed and active.
- In the WordPress admin, open Plugins → Add New.
- Type Tryo Chat in the search box, click Install Now and then Activate.
If you have a ZIP file, use Plugins → Add New → Upload Plugin and select the file.
As soon as the plugin is active, the chat button appears in the bottom-right corner of your store. A Tryo Chat item is added to the left menu.
Getting Started checklist
Section titled “Getting Started checklist”The Getting Started list at the top of the Tryo Chat → Dashboard page walks you through the first settings. When you save the settings for a step, it is ticked automatically.
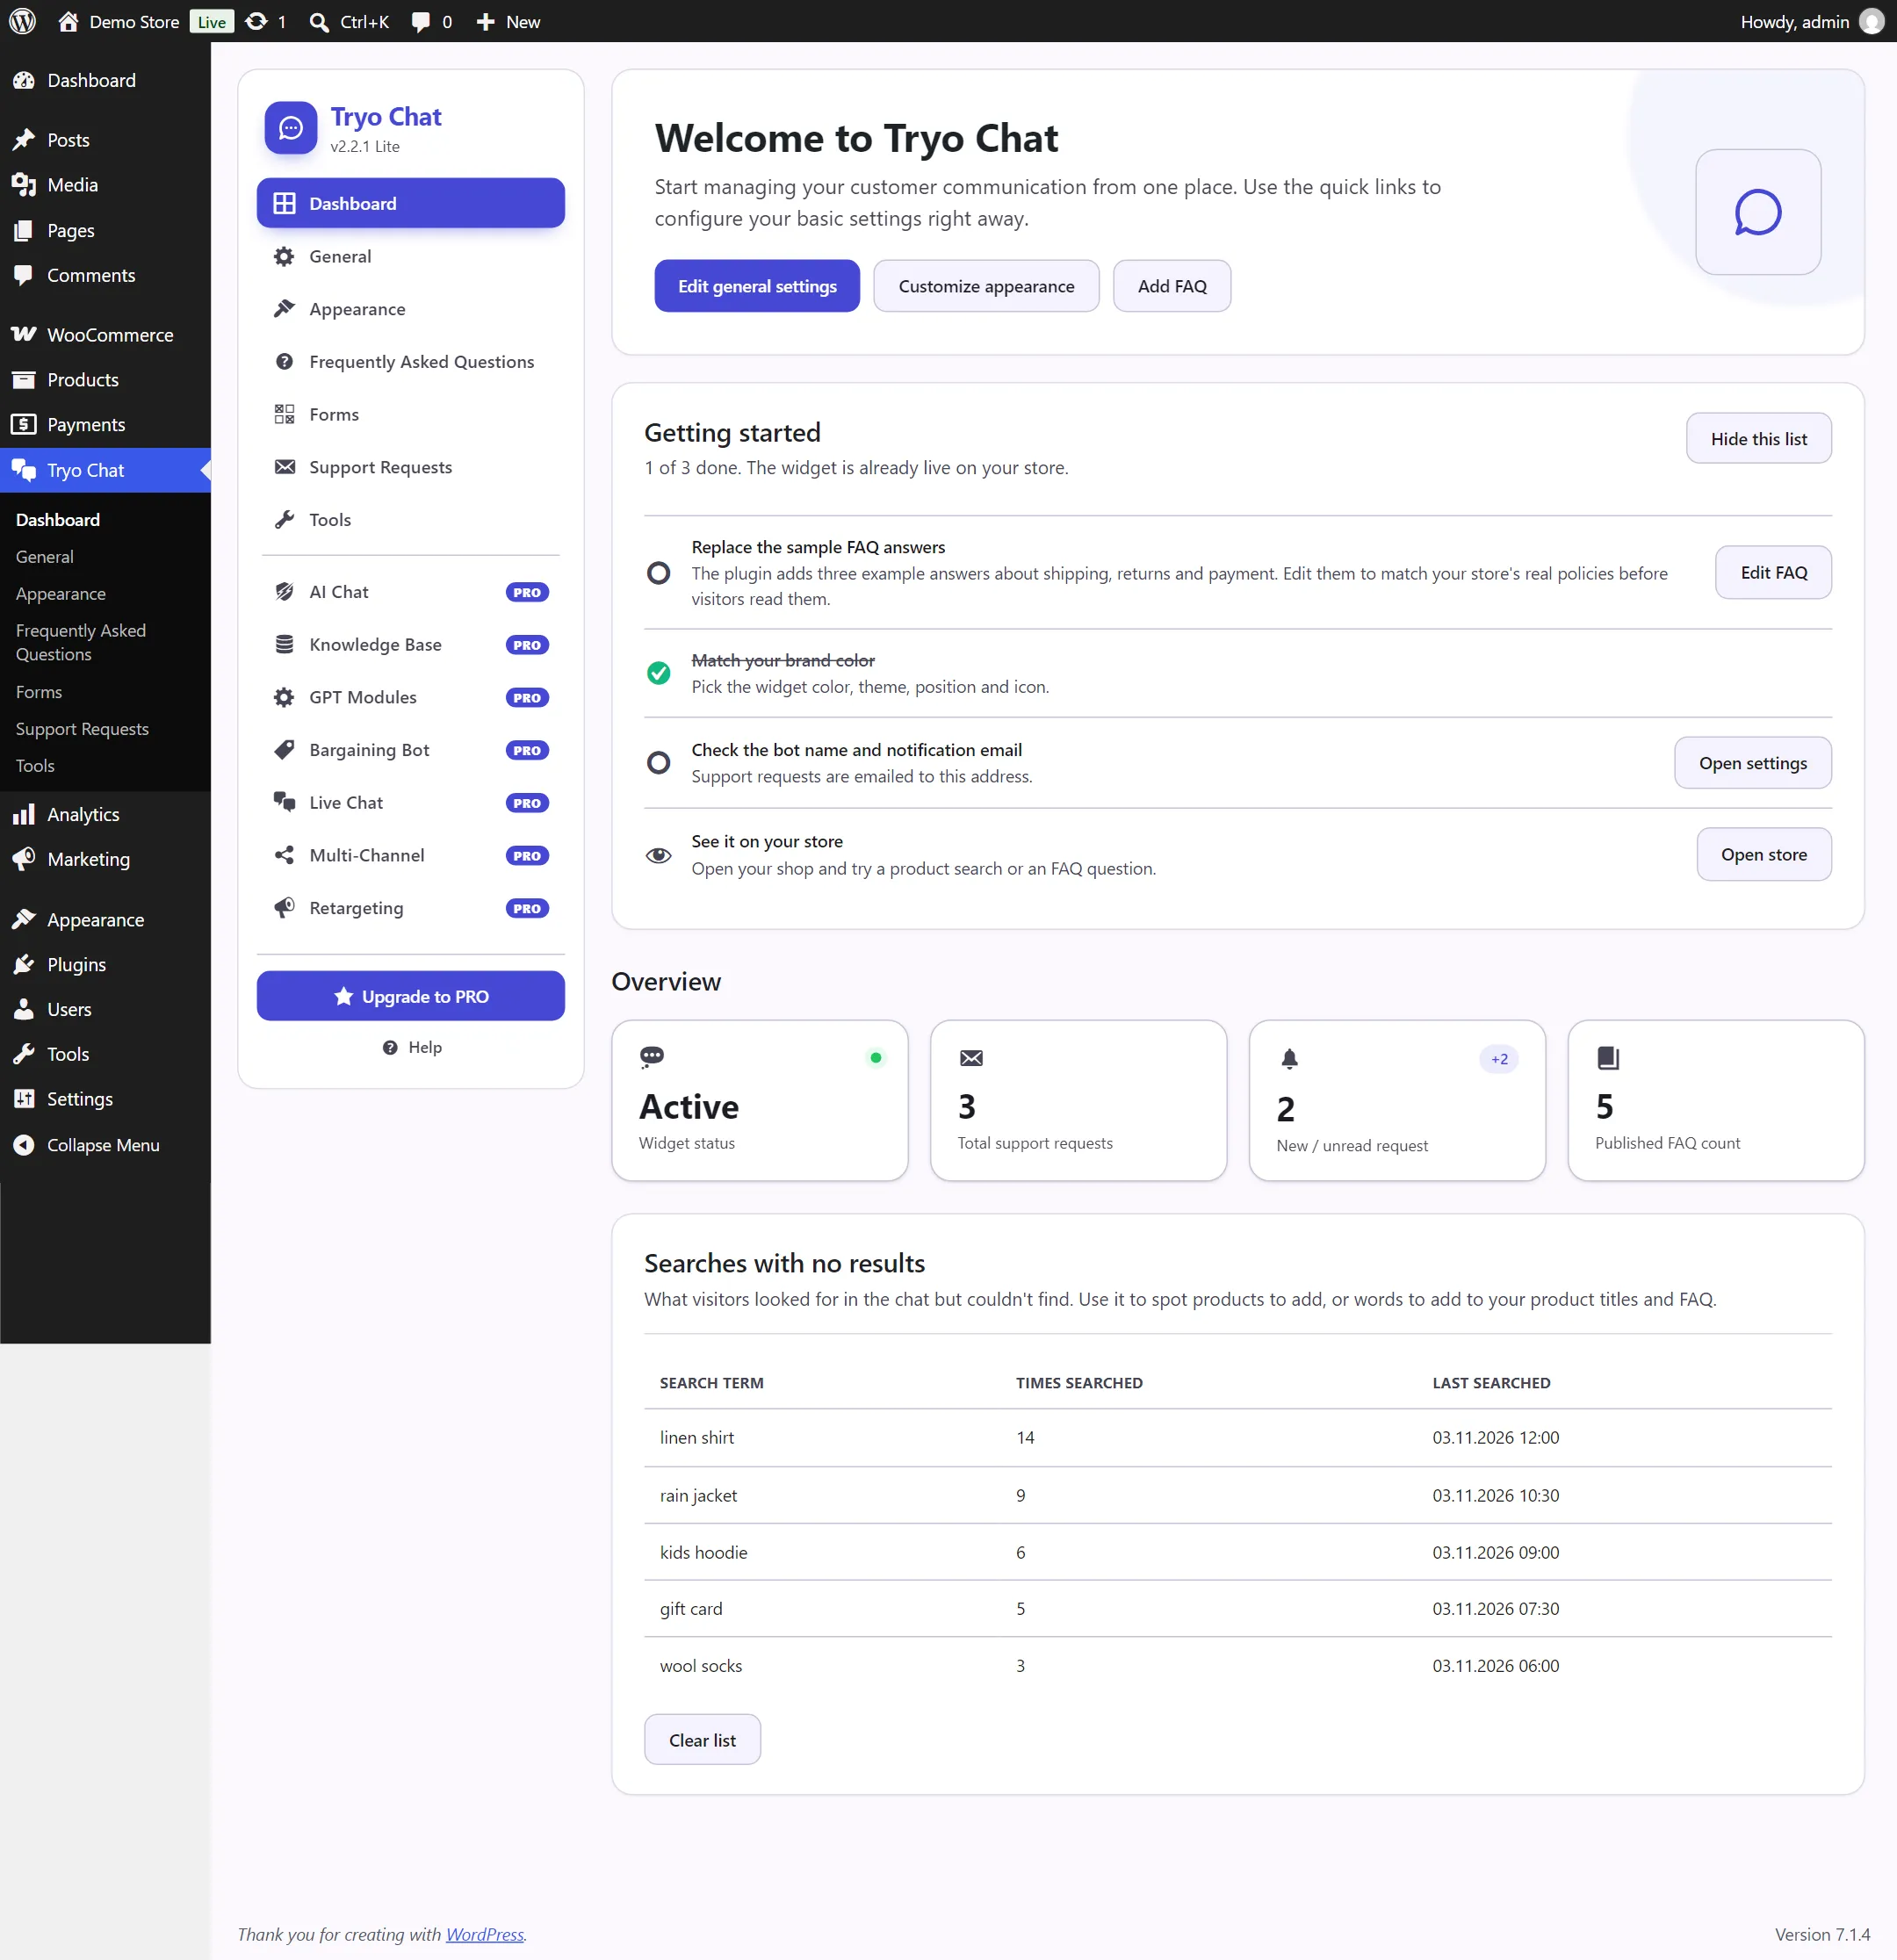
- Replace the sample FAQ answers. Edit each question to match your own shipping, returns and payment terms. Details: FAQ.
- Pick your brand color. Color, theme, position and icon. Details: Appearance.
- Check the bot name and the notification email. Support requests are sent to this address. Details: General settings.
- See it on your store. Open your store and try a product search and an FAQ question.
When you no longer need the list, click Hide this list.
Dashboard
Section titled “Dashboard”The Dashboard page shows:
- Widget status: whether the widget is on or off.
- Support requests: total and newly received requests.
- FAQ count: the number of published questions.
- Searches with no results: words visitors searched for in the chat without finding a match. Details: Product search and cart.
Who can manage it?
Section titled “Who can manage it?”Tryo Chat settings are visible to users who can manage WooCommerce: the Administrator and Shop Manager roles.
Removing the plugin
Section titled “Removing the plugin”- Deactivating turns the widget off; your settings, FAQs and records are not deleted.
- Deleting (Delete on the Plugins page) permanently removes all Tryo Chat settings, FAQs, forms, support requests and form entries.